
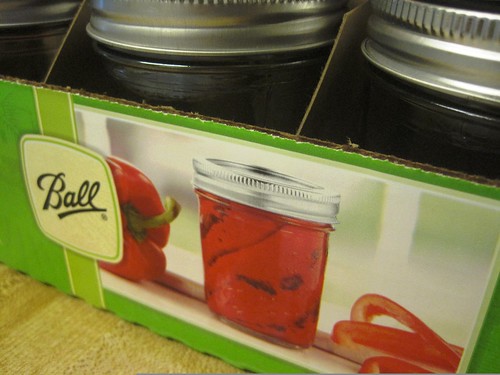
One way or another, I've planned to can produce this summer. I planted six tomato plants and expected to be a stewing, soup-making fool by now. Sadly, due to some combination of insects and weeks of extreme heat, I only harvested two tomatoes before the plants shriveled up. My bell peppers never took off, either. But red bell peppers were cheap at Easy-Way and the farmer's market last week, so I decided it was time to use the half-pint jars I bought forever ago.
This was my first-ever attempt at canning. I considered doing more research beforehand, but the instructions seemed pretty basic, and for once I wanted to try something new without overthinking it. I had everything I needed and was ready to go. I've since been told that it's dangerous to can on a ceramic cooktop, that jars shouldn't be placed directly into the pot, etc., but you be the judge of your own situation. :)
Marinated Red Bell Peppers
From Well Preserved by Eugenia Bone, via Preserving the Harvest
Ingredients:
4 lbs red bell peppers (about 8 to 10 medium)
1 cup bottled lemon juice
2 cups white wine vinegar with 5% acidity
1 cup olive oil
2 medium garlic cloves, sliced (about 1 tbsp) (I used minced garlic from a jar)
1 ½ tsp salt
Directions:
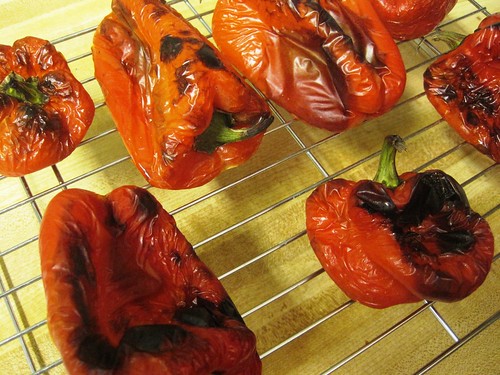
1. Place the oven rack about 7 inches from the broiler. Place peppers on a baking sheet and char them under the broiler, turning them often with tongs so that they blister all over, about 20 minutes. Meanwhile, prepare a large pot of boiling water.
2. Let the peppers stand until cool enough to handle. Don't put them in a paper bag, as some people like to do, or they will steam and change their texture. Remove the charred skin, cut the peppers in half, and remove the seed pods.
3. Combine lemon juice, vinegar, olive oil, garlic, and salt in a saucepan and heat just to boiling over medium heat.
4. Have ready 3 scalded pint jars and their bands. To scald, simply dip the jars in boiling water. Simmer new lids in a small pan of hot water to soften the rubberized flange.
5. Pack the peppers into the jars and pour the marinade over them. Using a butter knife, pop any air bubbles in the jars. See that the garlic slices are distributed evenly. Be sure to leave 1/2 to 3/4" headspace in the jars. Wipe the rims, place on the lids, and screw on the bands fingertip tight. (Confession: I don't know what this means)
6. Process the pepper jars in a boiling water bath for 15 minutes. Turn off the heat and leave the jars in the water for 5 minutes, then remove the jars and let them rest for 4 to 6 hours. Check the seals and store in a cool, dry place for up to a year. (Press down in the middle of the jar lids; if they don't cave in, that means the seals have set. Thanks Stacy!)
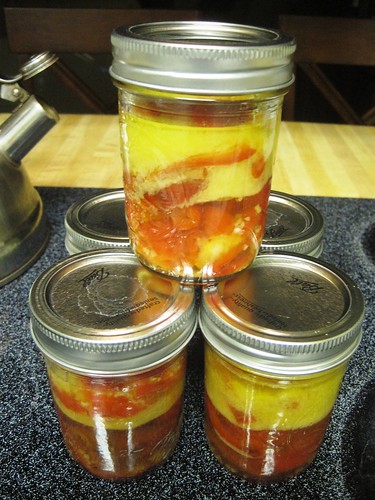
I had fewer peppers than the directions call for, so I also scaled down the marinade ingredients, unscientifically. I think I added too much lemon juice, which is why the marinade looks funny. Hopefully the peppers won't taste too lemony, but even if they do, there are worse things.
Go you! You'll have to let us know how the peppers came out when you bring them out this winter. :)
ReplyDeleteI have to give a bit of friendly scientific advice. :-) Be careful about changing up a recipe; there is a necessary pH requirement that will head off botulism (SCARY STUFF) and changing up a recipe often messes with that. I think you'll be okay since you added more lemon juice, but be careful!
ReplyDeleteHeather, I never thought about that. Thanks for the input. :)
ReplyDelete